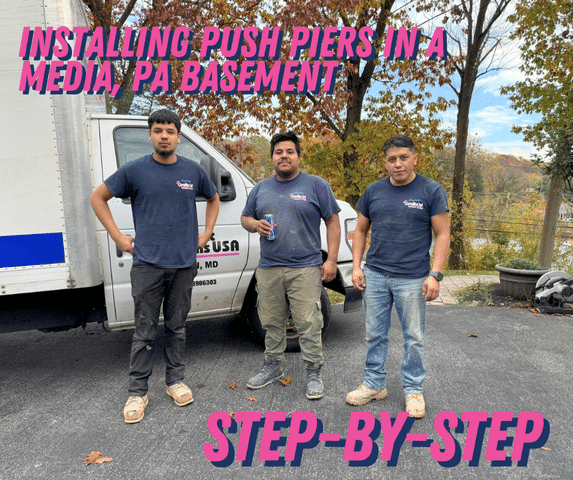
How We Installed Push Piers to Stabilize a Home in Media, PA
 Media, PA - Image 1" width="457" height="383">
When this Media, PA home began showing signs of foundation settlement (cracks in the basement walls, doors that stuck, and uneven floors) it was clear the structure needed more than cosmetic fixes. Because the house sits on a hill, the upper soils were shifting and carrying the foundation down with them. Rather than guesswork or invasive excavation, we chose a proven structural repair: Push Piers. Below is a plain-language, step-by-step look at how we installed the system and why it’s such a reliable long-term solution.
Step 1: Inspection & Planning
We started with a full foundation inspection and level survey to document settlement and identify where support was needed. This step determines pier spacing, capacity requirements, and exact excavation points. It also gives homeowners a baseline so they can see the improvement after stabilization.
Step 2: Layout & Site Prep
Once the plan was set, we marked and prepped the interior work areas in the basement. Protective coverings were laid down to keep the space clean. We located the footing and confirmed access inside the crawl/utility areas where each pier would be installed.
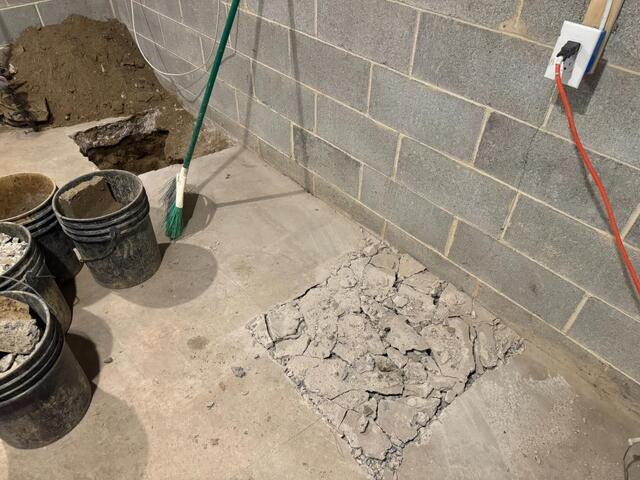
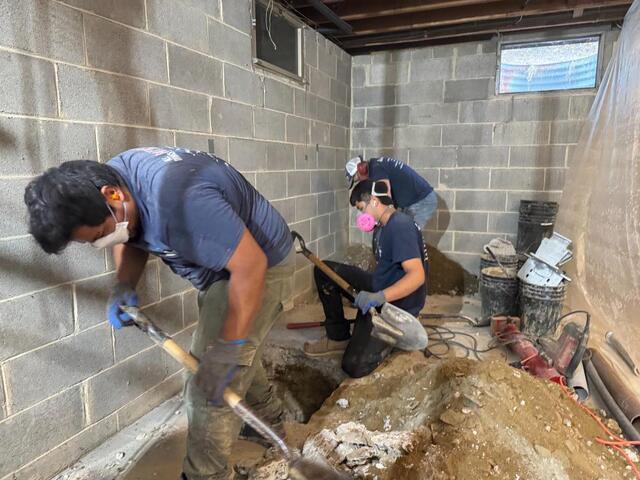
Step 3: Excavation To The Footing
Small, controlled excavations were made at each pier location down to the footing. These are minimal, targeted holes, no large trenches, so the interior disturbance is limited and repair times stay short.
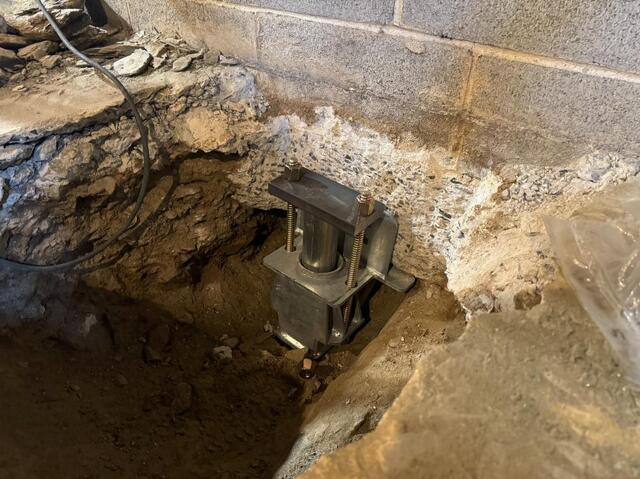
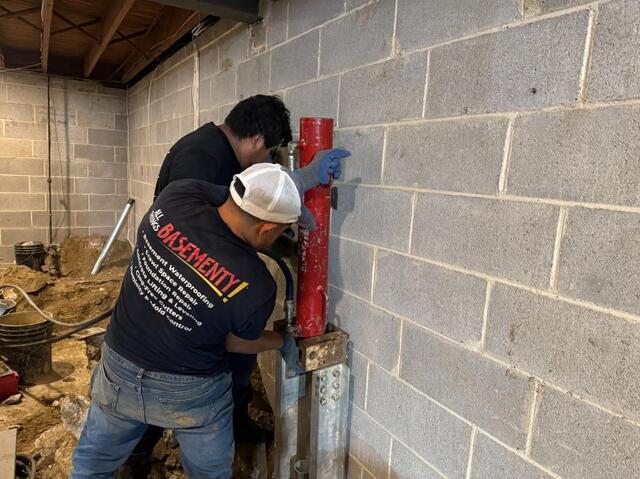
Step 4: Install Pier Brackets & Set The Pier Heads
A steel bracket is anchored to the foundation footing. The pier sections (heavy-duty steel) are assembled and positioned vertically, ready to be driven down through the unstable soils below the home.
Step 5: Driving The Piers
Using hydraulic equipment, the pier sections are pushed down through the soft, shifting soils until they reach competent bearing strata (stable soil or bedrock). Each pier is driven to a predetermined depth and tested to confirm it can carry the required load.
Step 6: Hydraulic Lifting & Load Transfer
Once the piers are confirmed to be on solid bearing, the house’s load is gradually transferred to the piers. Hydraulic jacks are used to lift the foundation back toward level in controlled increments. The process is monitored carefully to avoid damage to finishes, and we stop when the foundation is stabilized to specification.
Step 7: Secure & Lock The Piers
After the desired level is reached and load tests passed, the piers are permanently locked in place with high-strength hardware so the stabilized state is maintained indefinitely.
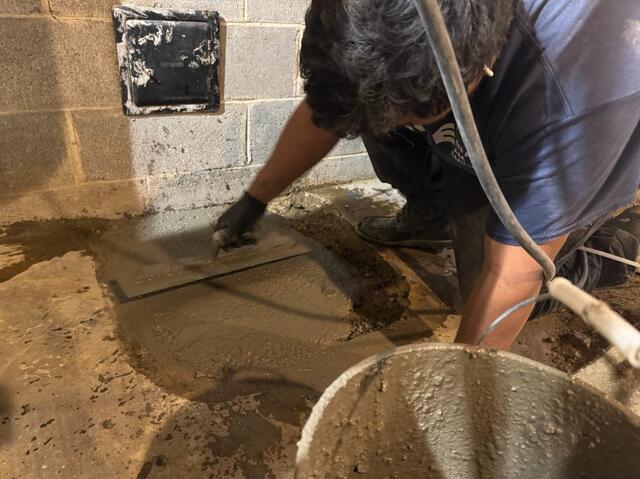
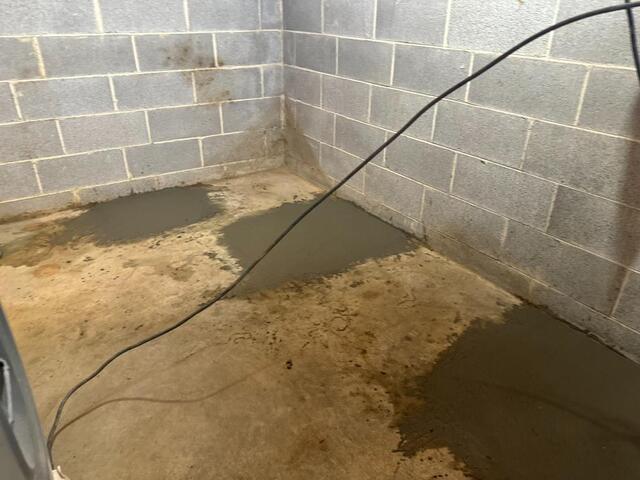
Step 8: Backfill & Concrete Finish
The small excavations are backfilled and finished with concrete so the basement slab looks neat and is structurally restored.
Step 9: Final Inspection & Homeowner Walkthrough
We perform a post-installation survey to document elevation changes and confirm stability, then walk the homeowner through the work, answer questions, and provide maintenance tips and paperwork.
Why Push Piers Are A Great Solution
• Permanent stabilization: Piers transfer load to stable soil/bedrock, stopping further settlement.
• Minimal disruption: Small interior excavations, no massive foundation digging.
• Load-tested: Each pier is driven and tested to ensure it can carry the specified load.
• Long-term value: Stabilizing the foundation protects the home, improves safety, and preserves resale value.
Quick Tips & FAQ
• How long does it take? Typical interior pier installs can be completed in a day or two, depending on access and number of piers.
• Will it lift my house back to original? Most jobs recover much of the settlement; the amount lifted depends on site conditions and how long movement has occurred.
• Any maintenance after? No special maintenance is required; piers are permanent. Keep documentation and the post-installation survey for future reference.
• Will it affect my basement use? Minimal footprint repairs are done, and we restore concrete finishes, so the space is usable quickly.