Basement Waterproofing and Foundation Repair in Wilmington, DE
 Wilmington, DE - Image 1" width="480" height="402">
When a Wilmington, DE homeowner reached out to us with worsening water intrusion and visible foundation damage, we knew it was more than a quick fix. What followed was a carefully designed and expertly executed project that tackled both basement waterproofing and foundation repair, leaving the space dry, secure, and protected for years to come.
Here’s how we did it Step By Step!
Step 1: Inspection & Diagnosis
Our process began with a thorough inspection by one of our experienced System Design Specialists. The homeowner explained their concerns: water regularly entering the basement and visible signs of bowing and cracking along the walls. After a full evaluation, it was clear that the water intrusion was exacerbating foundation wall instability, creating both a moisture problem and a serious structural concern.

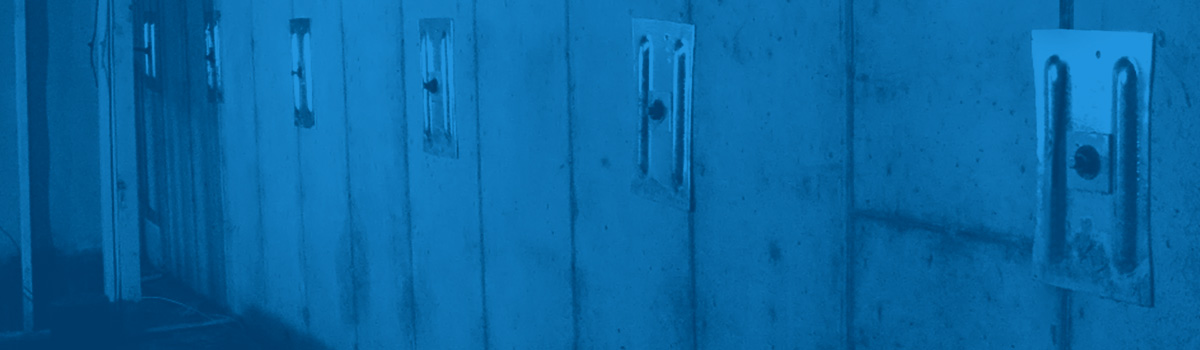
Step 2: Installing the WaterGuard Drainage System
To control the water problem at its source, we installed the WaterGuard sub-floor drainage system around the perimeter of the basement. Positioned just below the floor and at the base of the foundation walls, WaterGuard is designed to intercept wall seepage before it reaches the basement floor.
Our crew carefully removed a small section of the concrete floor along the interior perimeter, placed the WaterGuard system in position, and then re-concreted over it for a clean, seamless finish.
Step 3: Installing the TripleSafe Sump Pump
Collected water is only useful if it’s removed quickly and reliably, which is why we connected the WaterGuard system to our TripleSafe Sump Pump. This system includes three pumps in one unit, providing unbeatable protection even in the event of power outages or high-volume storms.

Step 4: Adding SilverGlo Wall Insulation
Before addressing the foundation stability, we also wanted to improve the energy efficiency and comfort of the basement. Our team installed SilverGlo wall insulation panels, which reflect heat back into the space and add a layer of moisture-resistant insulation. This step helps reduce future condensation issues and makes the basement a more usable environment overall.

Step 5: Foundation Reinforcement with EverBrace
With the water problem under control, it was time to stabilize the foundation. For this, we installed the EverBrace Wall Restoration System. This innovative solution is designed to support severely compromised foundation walls by transferring weight and pressure to new steel panels and specialized steel I-beams, effectively “bracing” the wall in place.
EverBrace not only strengthens the structure but also creates a clean, finished appearance inside the basement.

Step 6: Clean-Up & Final Walkthrough
Once all systems were in place, our crew carefully cleaned up the workspace, sealed off any open areas, and restored the basement floor. We completed a final walkthrough with the homeowner to ensure they understood how everything worked and what maintenance would look like moving forward.


Now, the homeowner's next step is to completely finish this basement!